CA
CATABLE OF CONTENTS
Integrating Cable Railing Systems with Wood Posts: A Guide to a Seamless Look
Combining the cozy warmth of wood with the clean appearance of a cable rail system is a wonderful combination that suits a lot of different homes. This blend of new and old materials provides you with an unobstructed view and is equally durable and safe. However, to achieve a good outcome that will endure, there is more to it than simply passing cables through wooden posts. This guide provides you with a definite plan for a decent installation. It starts from the selection of materials to the significant details that will make it appear fine and last for a long time.

Photos Provided By Lynn Brown
Why Combine Cable Railing with Wood Posts?
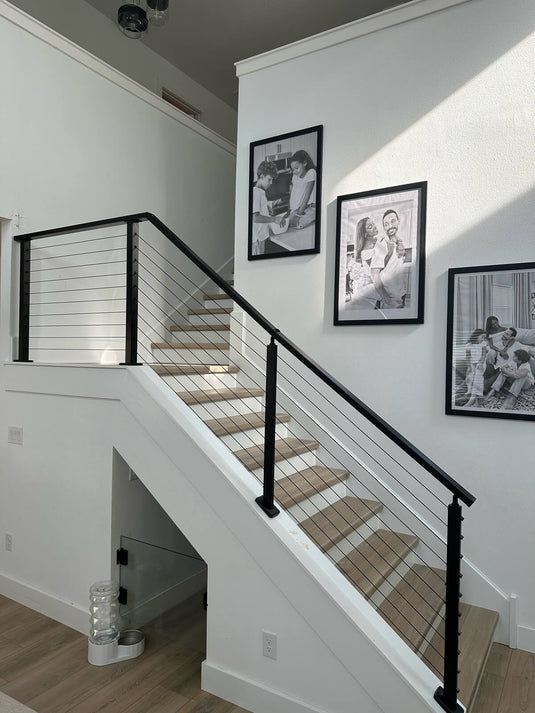
Individuals like this combination for more than looks. Wooden posts possess a warm, organic sensation that can temper the look of the metal cables. This causes the railing to integrate better outdoors or match other wood in your home. Wood is likewise a medium with which many people are comfortable working and it might be cheaper, especially if a deck already includes a wood structure.
This combination can be utilized in a variety of ways. In a country cabin, it can appear rugged and open. In a new home, it can bring a natural element to a new style. Once you know how to combine these two materials correctly, you can create a railing that is not only pleasant to gaze at but also sturdy and made to endure.

Photos Provided By Lynn Brown
The Foundation: Choosing the Right Wood and Post Dimensions
The success of your project starts with the posts themselves. The right wood and right size are very important to the look and safety of your railing system. The posts need to be strong enough to handle an enormous amount of pressure from the cables.
1️⃣ Selecting the Right Wood Species 🌲
Where you're putting your railing will determine what the best wood to use is. For outdoor projects such as decks, you'll need a wood that will withstand the rain, sun, and temperature fluctuations.
● Cedar and Redwood
These are high-end choices because they naturally resist rot and insects. They offer a beautiful, natural color but come at a higher cost.
● Pressure-Treated Pine
This is the most budget-friendly option. It is chemically treated to resist rot and insects, making it highly durable for outdoor use. It can be painted or stained to achieve your desired look.
For interior railings, you have a greater variety of options since you don't need to consider the weather. Woods such as Oak, Maple, or Douglas Fir are excellent options that are durable and aesthetically pleasing.
2️⃣ Understanding Post Dimensions and Strength
Not every post performs the same function. The tension from a cable rail system places a tremendous amount of sideways pressure on the posts at which the cables terminate.
● Terminal Posts
These are your corner and end posts where you tighten the cables. A standard 4x4 post is usually not sturdy enough and will bend under this stress. It is an excellent idea to utilize 6x6 posts for all your corner and end posts.
● Intermediate Posts
These are the mid-posts through which the cable just runs. A 4x4 post usually suffices for this purpose.
● Post Spacing
To avoid the cables sagging and for safety, posts need to be 4 feet apart or closer. Always check your local building codes for what they require for post size and spacing.
Essential Hardware: The Components of Your System
A cable rail system consists of some very important components. If you understand the function of each component, the installation will be a lot simpler.
● Cable
The railing itself is typically constructed of 1/8" or 3/16" thick stainless steel cable. Grade 316 stainless steel is the ideal material for exterior railings, particularly in coastal areas, as it has a high resistance to rust.
● Tensioning Hardware
This refers to the hardware that tightens the cable. Typical components are turnbuckles and other adjustable fittings. This hardware is installed on one or both ends of a cable.
● Non-Tensioning Terminals
These components are utilized to simply grasp one end of a cable when the other end performs all the tightening. They tend to be smaller and less expensive.
● Protective Sleeves/Grommets
These small parts are very important. You put them in the holes of your wood posts. They stop the cable from rubbing and cutting into the wood over time. This protects both the cable and the post.
● Tools
You will require a specific cable cutter in order to obtain a clear cut so that the wire does not fray. You will also require a crimping tool if your hardware requires it.
Ready to start your project? 🏡
Fill out the quick form below for a free quote and expert recommendations!
Start My Project →The Installation Process: A Step-by-Step Overview
Once you have your materials and hardware, careful planning and execution are the keys to a clean, professional-looking result.
Step 1: Planning and Layout
Mark post locations no more than 4 feet apart. Check local code requirements for railing height (36" or 42") and cable spacing (usually under 3").
Step 2: Preparing and Mounting the Posts
Secure posts firmly to the deck frame using lag bolts or post anchors. A solid post is the foundation of a safe cable railing.
Step 3: Drilling the Holes
Use a drill guide to keep holes straight and level. Crooked holes can lead to uneven cable lines and premature wear.
Step 4: Installing Hardware and Running the Cable
Insert protective sleeves in wood posts, attach hardware, and run the cable through all posts. Leave cables slightly loose.
Step 5: Tensioning for a Taut, Safe Finish
Tighten cables evenly, starting from the middle. Cables should feel firm without putting excess stress on the posts.
Critical Considerations for a Lasting Installation
So your railing will endure for years to come, pay close attention to these key details for wood post installations.
Preventing Cable Wear on Wood
As we mentioned earlier, you need to utilize protective sleeves. As time goes on, wood expands and contracts, and the cables shift slightly. Without protection, a cable will gradually slice into the wood post. This compromises the strength of the post and can also harm the cable, which isn't safe.
Managing Tension on Wood Posts
Wood is not as hard as metal, so it will bend or crush under a lot of pressure. That is why it is so important to use heavier 6x6 end posts. Another thing you can do to reinforce is to put in a solid top rail that runs along all the posts. A solid top rail distributes the pressure throughout the entire system rather than just the end posts.
Maintenance and Upkeep
Your new railing will need minimal maintenance. The wood posts should be cleaned, and a new coat of sealer or stain applied every few years to prevent them from being weather-damaged. The cable and fittings should be wiped down every now and then to clean off dirt. You'll also want to check the cable tension every year and tighten it if it's needed, as cables do stretch a bit over time.
Conclusion
Assembling a cable rail system with wood posts provides a stylish and functional appearance that won't go out of style. With the proper materials, stout posts, and attention to little details such as protective sleeves and tightening appropriately, you can achieve a safe and good-looking railing. This combination of natural and contemporary components is an attractive solution that will enhance the appearance of your space and provide unobstructed views for years to come.