CA
CATABLE OF CONTENTS
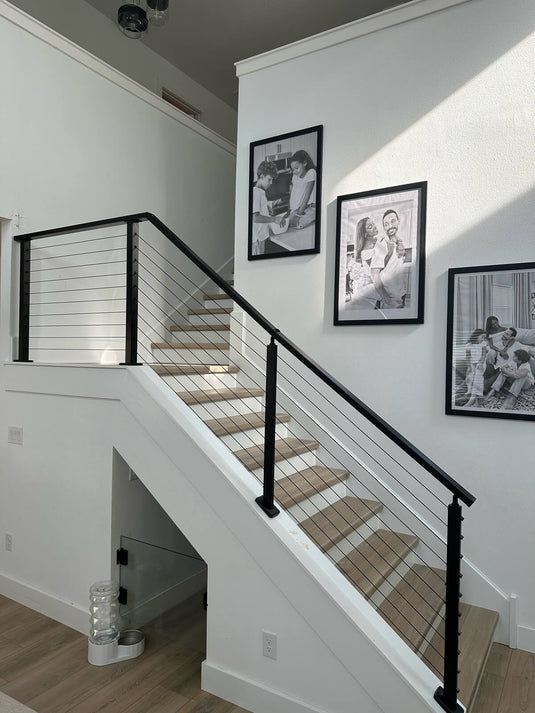
Can You Add a Stainless Cable Railing to the Existing Deck?
Quick Answer
Yes, it is often possible to add stainless steel cable railings to an existing deck, provided the current deck structure can support the cable railing system. The key considerations are evaluating if the existing deck can handle the cable load without reinforcement, ensuring proper post spacing and height, and using the right stainless cable railing components and hardware for installation. With careful planning and execution, cable railings can be installed on existing decks to enhance safety and aesthetics.
Introduction
Stainless steel cable railings are a popular choice for enhancing the safety and appearance of existing decks. With their minimalist profile, cable railings help maintain open views while improving the deck's aesthetics. However, proper planning and execution are required when adding cable railings to an existing deck. This article will discuss key considerations for adding cable railings, from assessing your existing deck to choosing the right components and installation process. You’ll learn insider tips to determine if cable railings are the right fit, select compatible materials, and install them properly on your existing deck.

Evaluating Your Existing Deck for Cable Railings
Before choosing a cable railing system, you'll need to assess your current deck to determine if it can structurally support the addition of cable railings. Carefully examine the deck boards, posts, and foundation to check for any weak points or deterioration. Areas that look worn or damaged may require reinforcement before installing cable railings.
Also, take note of the spacing between your existing posts. Cable railings require posts installed at specific intervals to properly tension the cables. Typical post spacing is 4 to 5 feet for straight cable run designs. If your current post spacing is significantly wider, you may need to add additional posts to properly support cable railings.
In addition, verify that your existing post heights match the height requirements for cable railings. Cable posts are generally 36 to 42 inches tall to provide proper cable height for safety and code compliance. If your deck's posts are shorter, you'll need to replace them or use post extenders to achieve the right height for cables.
Doing this upfront evaluation of your deck’s current structure and layout will determine what kind of prep work, reinforcements, or modifications may be required before your new cable railings can be installed. Consulting with a professional installer early on can help identify any issues to address.
What are the Benefits of Adding Cable Railings to Existing Decks?
➢Enhanced Safety, Aesthetics, and Views
Upgrading old or deteriorating deck railings to new stainless cable railings greatly improves safety. Cable railings meet newer code requirements and provide a very sturdy, secure barrier. Their minimalist look also enhances the visibility of surrounding views compared to solid wood or glass panels. This allows you to enjoy your deck’s vistas.
➢Matching Existing Deck Style and Layout
Cable railings are an ideal option for a new railing system that matches and complements your current deck’s style. Their contemporary sleek lines pair well with most designs. Planning the cable spacing and post layout to align with your existing deck structure results in a cohesive look.
➢Cost Considerations for Cable Railing Install
In terms of affordability, cable railing systems are competitively priced with other railing types. While cost varies based on the size of your deck, cable railings are often cheaper compared to glass or ornate wood designs. But specialized labor is required for proper installation, increasing the total project cost.
➢Maximizing Future Resale Value
Replacing outdated or subpar deck railings with new cable railings also boosts your home's future resale value. Their customizable look provides broad appeal to potential buyers. Cable railings also signal that your deck’s underlying structure is sound and upgraded to current safety standards.
Refreshing your deck with cable railings results in improved safety, style, and satisfaction. Their versatile look blends well with your existing deck while providing a clean, updated appearance. With careful planning and installation, you can safely and effectively integrate cable railings.
How to Choose Your Stainless Cable Railing Components

➢Stainless Steel Cable Types and Sizes
To resist corrosion in outdoor settings, 316 and 304-grade stainless steels are commonly used for cable railings. In order to prevent sagging over long spans, thicker cables of 3/16 or 1/4-inch diameters are recommended for straight cable runs. Using multiple thinner cables bundled together can also provide added stability. When choosing the look you want, consider appropriate stainless steel cable diameters ranging from 1/8 inch to 3/8 inches.
➢Stainless Cable Fittings and Tensioners
To properly attach and tension the cables, specialized stainless steel hardware is used. Typical parts include cable clamps, threaded studs, turnbuckles, and eye bolts, all made of marine-grade stainless steel to withstand weather conditions. For a consistent appearance, matching all the fittings and tensioning components provides a seamless finished look.
➢Stainless Steel Cable Rail Posts and Anchors
Brushed stainless steel posts complementing the cables are commonly used in contemporary deck designs. To determine the number of posts needed, take into account the desired cable spacing. For smooth connections, match the post diameters to the cable fitting sizes. Appropriate anchors are used to firmly attach the posts to the deck substructure.
➢Additional Stainless Accessories
To match existing deck aesthetics, consider stainless steel accessories like ornamental top rail caps, lights embedded into top rails, and privacy screens. Dividing cables into upper and lower sections with middle support cables also adds style. Coordinate all additional accessories with the overall deck layout and look.
Installation Process for Cable Railings
➢Outlining Typical Installation Steps
The installation of cable railings involves several key steps. Starting with the posts, they must be securely mounted to the deck substructure in the pre-determined spacing using the proper anchoring hardware. With the posts in place, the cables can be cut to the required lengths and attached to the posts using fittings like studs and stoppers. Using turnbuckles, the cables are then tensioned until taut. Finally, any additional accessories should be installed, like lights or privacy screens.
➢Attaching Stainless Cable Railing Posts and Running Cables
To install the posts, the appropriate mounting locations are marked based on planned cable spacing. After drilling holes for anchors, the posts are fastened to the deck’s wooden structure with stainless steel lag bolts or concrete anchors. Once the posts are secured, the cables can be cut and attached to the posts using the chosen fittings and studs.
➢Leveling and Properly Tensioning Cables
Maintaining an evenly level line is crucial when installing the cables. The turnbuckles should be adjusted on each cable to eliminate any sagging and tightly tension the cables. Tension gauges or laser levels can be used to verify consistent level alignment and tension across all cables.
➢Building Permits or Codes to Consider
Depending on your location, building permits from the city may be required prior to installing cable railings. Your installer can determine if a permit is needed. It is also important to check that your planned cable railing height meets local deck code requirements.
➢DIY vs Professional Installation
Due to the need for precise measuring, leveling, and tensioning, it is highly recommended to have cable railings installed professionally unless you have extensive experience. Safety issues could arise from improper DIY installation.
How to Inspect Your Deck Railings After Installation

➢Testing Cable Connections and Tensions
Once the installation is complete, thoroughly inspect each cable connection at the posts. Tug on the cables to verify the fittings are tightly secured. Also, test the cable tension by pushing or plucking the cables - they should have minimal give and quickly snap back into place when aligned properly.
➢Checking Alignments and Leveling
Use a level tool to check that all cables are precisely level across their entire length. Cables can settle and stretch slightly after initial tensioning. Re-tighten any turnbuckles as needed until all cables are completely level and taught.
➢Examining All Attachment Points
In addition to the cable connections, closely check every place that the cable railing components are connected to the deck. Look for complete and uniform contact between each post base and the deck surface it is mounted on. Also, verify consistent spacing between each post.
➢Address Any Issues Immediately
It is crucial to immediately address any problem areas discovered during inspection to ensure safety and durability. Any inconsistencies in cable tension, connections that slip, or improper post-installation could lead to early failure or dangerous conditions. Catching flaws quickly leads to an easier repair.
How to Maintain and Care for Your Stainless Steel Cable Railing
➢Cleaning and Care Recommendations for Stainless Cables
While stainless steel resists corrosion and rust, it still requires periodic cleaning and maintenance. Use a mild soap and water solution or commercial stainless steel cleaner to remove dirt and residue from cables. This helps preserve the appearance and reduce mineral deposits. Avoid harsh chemicals or abrasive cloths.
➢Lubricating and Adjusting Cable Hardware
It is important to periodically lubricate all moving parts like turnbuckles and tensioning devices per manufacturer instructions. This ensures smooth operability for tension adjustments. An annual re-tensioning of all cables is also recommended to compensate for any stretching over time.
➢Checking Connections and Tension Over Time
Cables may need re-tightening every few years as temperature fluctuations and use can cause stretching. Visually inspect cable fittings, posts, and mounting hardware for any signs of wear or looseness. Look for frayed cables around connections. Proactive maintenance prevents dangerous failures.
➢When Repairs or Replacements May Be Needed
If any cables become excessively loose, damaged, or completely detached, immediate replacement is required. Severely bent or askew posts also require repair or replacement. For smaller issues like stretched cables or loose fittings, spot repairs may suffice. But major damage usually necessitates full cable railing replacement.
Proper seasonal maintenance allows stainless cable railings to last for decades. But deterioration accelerates without regular inspections, adjustments, and cleaning. Consult your installation company for brand-specific maintenance tips.
Conclusion
Adding stainless steel cable railings can be a great way to enhance the safety, aesthetics, and functionality of your existing deck. However, proper evaluation of your current deck structure and layout is crucial to ensure it can support the cable railing system. If reinforcement or modifications are required, it is best to address these before installation.
If considering adding cable railings to your existing wood or composite deck, thorough research and an experienced installer can help guide you through a successful installation process. Your dream cable railing system can be a reality with the right approach and components.