CA
CATABLE OF CONTENTS
Securing Deck Railing Posts: Preparing for Late-Spring Rains
Late spring brings rain, making the stability and safety of your deck railing more critical than ever. Whether you're installing a new deck rail system or maintaining an existing one, proactive preparation can ensure your deck withstands wet weather.

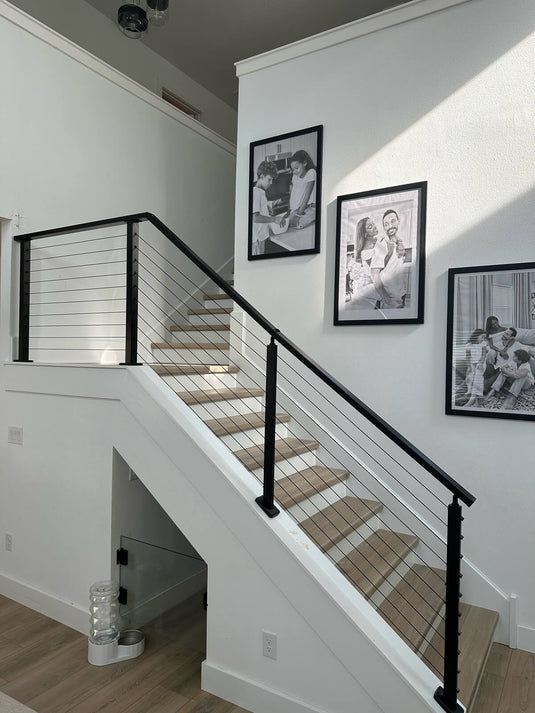
--Photo credit: Muzata customer
Part 1: Initial Installation — Building a Solid Deck Railing Foundation
Whether you're opting for wood, metal, or cable railings, figure out how to attach deck railing and secure deck railing posts are the backbone of any system. Here's a step-by-step guide to get your deck rail installed before the spring rains hit.
1. Choose the Right Railing System
Select a railing material that suits your deck's style and budget. Wood offers a warm, natural look, metal cable railings are not only corrosion-resistant, but also have an open, modern aesthetic. Ensure your choice complies with local building codes, such as railing height (typically 36-42 inches) and spacing requirements.
2. Install Deck Railing Posts
The stability of your railing posts determines the entire system's safety. Follow these steps:
-
Measure and Mark: Based on your design and code requirements, mark post locations.
-
Secure the Posts: For wooden decks, use galvanized or stainless steel bolts to attach posts to the deck frame, preventing rust over time. For concrete decks, use expansion anchors. Drill holes at marked spots, clear debris, and insert anchors, ensuring they're deeply set.
-
Ensure Leveling: Use a post level to verify each post is plumb. If the surface isn't perfectly even, insert plastic shims to adjust. Shims fill gaps and ensure stability.
- Tighten Bolts: Gradually tighten bolts with a wrench or drill to avoid shifting the post. Use a hammer if needed to firmly set expansion anchors.
Tip: Wear gloves and safety glasses to protect yourself during drilling or bolt tightening.
3. Attach Handrails
The handrail is both functional and aesthetic, serving as the "face" of your railing system. When installing:
-
Ensure the handrail height meets code (typically 34-38 inches).
-
Use dedicated connectors, like handrail brackets or angle brackets, to secure the handrail to posts.
-
For wooden handrails, pre-drill holes before screwing to prevent splitting.
Budget Tip: Stainless steel or aluminum handrails have a higher upfront cost but lower long-term maintenance. Wooden handrails are budget-friendly but require regular sealing or painting to resist moisture.

4.Tighten Cables
The cable is the solid line of defense of the cable guard system, effectively connecting the various posts to prevent people or objects from accidentally passing through the gaps. Thread the cables through the posts. Ensure that you use adhesive washers to protect each post. Begin with the center cable and alternately tighten the upper and lower cables to maintain optimal stability in the system.

Part 2: Ongoing Maintenance — Keeping Your Railing Rain-Ready
Late-spring rains can loosen, rust, or damage your deck rail. Here's a maintenance checklist to ensure your railing system stays safe and durable.
1. Check Deck Railing Posts for Looseness
Posts are the system's foundation, so regular checks are essential.
-
Steps:
-
Gently push each post to detect wobbling.
-
Use a level to confirm posts are still plumb. If they're leaning, insert plastic shims as needed (see installation tips for shimming).

--Photo Credit: Content Creator @Andrew Thron | Partnered with Muzata

--Photo Credit: Content Creator @Andrew Thron | Partnered with Muzata
-
Inspect bolts or expansion anchors for looseness. Tap anchors with a hammer to ensure they're secure, then tighten with a wrench.
Spring Tip: Rain can soften soil or crack concrete, so check post bases for pooling water or erosion and reinforce as needed.
2. Inspect Cable Tension (For Cable Railings)
Cable railings are sleek and modern but can loosen in wet weather.
-
Steps:
-
Test each cable's tension by gently pulling—it should feel taut.
-
Use provided tools (like a tensioner) to tighten cables to the desired level.
-
Test the railing's overall stability to ensure cables can withstand pressure, preventing accidents with kids or pets.

--Photo credit: Rebecca Brand / Muzata customer
Resource: Methods for Deck Railing Cable Maintenance offers detailed tips on tensioning and cleaning.
Spring Tip: After rain, wipe cables with a dry cloth to prevent water spots or oxidation.
3. Look for Rust or Wear
Different materials require unique care:
-
Metal Railings: Check for rust or peeling coatings. Remove light rust with a wire brush and apply rust-resistant paint. For stainless steel, clean with water or soapy water to maintain shine.
Spring Tip: After rainy days, inspect bolts and connectors for corrosion and replace if necessary.
-
Wooden Railings: Look for cracks, rot, or insect damage. Spring moisture accelerates wood decay, especially at post bases. Apply a waterproof sealant or outdoor paint annually to protect against rain.
Resource: 11 Best Woods for Outdoor Stair Railing highlights durable options like cedar and redwood.
Spring Tip: Before the rainy season, patch any cracks to prevent water seepage and further damage.
4. Should You Replace Wooden Posts with Stainless Steel?
Wooden posts are attractive but prone to rot in rainy conditions, especially in late spring. If maintenance feels overwhelming, consider switching to stainless steel:
-
Pros: Stainless steel resists corrosion, ideal for wet climates, and requires minimal upkeep. Sleek and modern, it pairs well with cable or glass railings.
-
Cons: Higher initial cost (depending on size and brand). Requires professional tools (like a drill) to install and match your existing deck.
Budget Tip: If funds are tight, start by replacing critical posts (like corners or stair posts) and phase in others over time.

Part 3: Practical Tips for Late-Spring Rains
Rainy weather tests your deck railing's resilience. Here are extra tips to keep it in top shape:
-
Improve Drainage: Ensure water flows away from your deck to prevent pooling around post bases. Consider adding a drainage channel or adjusting the ground slope.
-
Clean Regularly: After rain, rinse railings to remove dirt and leaves, preventing stains or mold.
-
Check Codes: Verify your railing's height, spacing, and load capacity meet local regulations, especially for homes with kids or pets.
-
Balance Budget: Invest in high-quality bolts and connectors—cheap hardware corrodes quickly in wet conditions, creating safety risks.
Part 4: A One-Stop Solution for Safety and Style

With Muzata installation and maintenance steps, you can build and sustain a deck railing system that's both sturdy and stylish. Whether you're learning how to install deck railing posts for the first time or tightening cables on an existing deck rail, success lies in choosing quality materials, paying attention to detail, and checking regularly. Late-spring rains are inevitable, but with preparation, your deck will shine through the wet season.
Final Reminder: Safety first! Use proper tools and protective gear during installation or maintenance. If you're unsure about any step, consult a professional to ensure compliance with codes and standards. We hope this guide inspires you to refresh your deck!
Want a free quote and design? Muzata is ready to start your project anytime.