CA
CATABLE OF CONTENTS
Solving Common Cable Railing Kit Installation Problems: A Troubleshooter's Guide
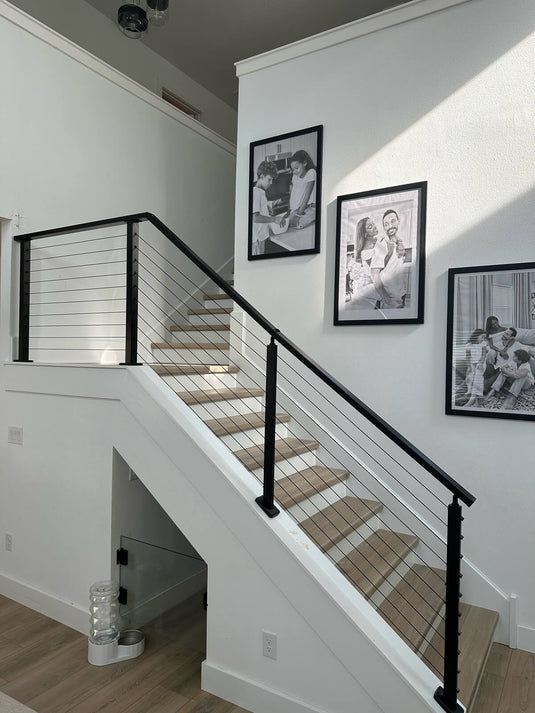
You’ve unboxed your brand-new cable railing kit and set your posts, ready to bring that sleek, modern look to your deck or staircase. Everything is going great... until it isn't. Suddenly, the cables are sagging, the posts are bending, and the project has ground to a halt. Nearly every DIYer hits a few common roadblocks when installing a cable railing for the first time. This guide will walk you through the most frequent problems and provide clear, step-by-step solutions to get your project back on track.

Pre-Installation Checklist to Avoid 90% of Problems
Getting these three things right from the start is the key to a smooth installation.
1. Did you get the right tools?
A standard toolbox may not be enough. A cable railing kit requires a few specialized tools to achieve a clean, professional finish. Trying to make do with the wrong tools is the number one cause of frustration. Make sure you have:
- A dedicated Cable Cutter: Not pliers or snips. You need a tool designed to make a clean, sharp cut without fraying the cable.
- A Crimper/Swaging Tool: If your kit uses crimp-on fittings, you need the specific tool recommended by the manufacturer to secure them properly.
- A Tensioning Wrench: For adjusting and tightening the cables to the correct tension.
- A Drill Guide: To ensure perfectly straight holes, if you need to drill them yourself.
2. Did you check your local building codes?
Building codes are not suggestions; they're the law. Before you drill a single hole, check your local requirements for railing height and cable spacing. Most areas follow common standards like a minimum railing height of 36 or 42 inches and the "4-inch sphere rule," which means the gap between your cables cannot be large enough for a 4-inch sphere to pass through. This ensures safety, especially for children.
3. Is your post structure strong enough?
A fully tensioned cable railing puts hundreds of pounds of pulling force on your end posts (called terminal posts). If they aren't strong enough, they may flex or pull inward when the cables are tightened.
When selecting your posts, be sure to confirm that they are suitable for use as end or corner posts.
Common Installation Problems & Their Solutions
Okay, you're in the middle of the job and hit a snag. Let's diagnose the issue and get it fixed. This is the core of our troubleshooter's guide.
🔧 Problem 1: My cables are sagging or feel loose.
This is by far the most common issue with any cable railing installation. You've tightened everything, but the cables still have a noticeable droop.
❓ Why it happens:
Cables often sag when they haven't been tensioned enough overall, or when components like end fittings slip under load. Long runs and unsupported spans can also contribute to visible droop.
✅ How to fix it:
First, make sure each cable is cut to the correct length—neither too long nor too short—to avoid installation issues or uneven tension.
Begin by loosely hand-tightening all the cables. Then use a tensioning tool to bring each one up to the recommended tension level, typically between 150–300 pounds, depending on the cable size and span length.
Tensioning should usually start from the middle cable, then alternate between upper and lower cables, working your way outward. This helps distribute the load evenly and minimizes sagging.
Also check the spacing between your posts. For longer spans, you may need intermediate posts to maintain stability and prevent excessive cable deflection.
Once tensioning is complete, verify that all cables have even tension to ensure consistent appearance and safety.
🔧 Problem 2: My end posts are bending inward.
You start tensioning the cables, and to your horror, you see the end posts starting to bow like a banana.
❓ Why it happens:
This usually means the posts aren’t strong enough to handle thecombined tension from multiple cables. It's especially common with thin-walled metal or hollow wood posts.
Improper tensioning sequence—such as tightening cables from top to bottom—can also cause uneven force distribution, placing excessive stress on one part of the post and worsening the bending.
✅ How to fix it:
Make sure your end posts are made from solid wood or thick-walled metal that can handle cable tension. Before installation, confirm with your supplier that the posts are rated for use as terminal posts. During tensioning, avoid tightening cables from top to bottom or bottom to top. Instead, start from the middle cable and alternate between upper and lower ones. This ensures even force distribution and minimizes stress on any one part of the post.

🔧 Problem 3: My cable ends are frayed after cutting.
You make a cut, and the end of the stainless steel cable immediately unravels into a messy, frayed mess, making it impossible to insert into the fittings.
❓ Why it happens:
You used the wrong tool. Standard wire cutters or pliers crush the cable instead of shearing it, which causes the individual strands to separate.
✅ How to fix it:
You absolutely must use a dedicated cable cutter designed for stainless steel wire rope. These tools have hardened jaws that make a clean, precise cut. A great pro-tip is to wrap the spot you're about to cut tightly with electrical tape first. Cut right through the middle of the tape to keep the strands held together perfectly.
🔧 Problem 4: My fittings are difficult to attach or crimp.
You’re struggling to get the cable fully seated in the terminal fitting, or your crimped connection feels loose and insecure.
❓ Why it happens:
This usually stems from a frayed or uneven cable end, as mentioned above. It can also happen if you aren't using the manufacturer-recommended crimping tool, which is designed to apply the exact pressure needed.
✅ How to fix it:
First, ensure you have a clean, un-frayed cable end. Make a fresh cut if needed. When inserting the cable into the fitting, make sure it is pushed all the way in until it bottoms out. For crimping, use the correct tool and apply steady, even pressure. Many kits have a " go/no-go " gauge to check if the crimp is secure.

Conclusion
Most cable railing installation problems can be prevented with careful planning or solved with the right technique. The keys are patience, using the correct tools for the job, and following a methodical process. Don't let a small hiccup derail your project. Take a deep breath, follow these steps, and you will achieve that beautiful, professional-looking cable railing you envisioned. Good luck with your project.