CA
CATABLE OF CONTENTS
New House Stairs Installation Guide: From Measurements to Finish
Stairs are a fundamental feature in any home, providing safe and reliable access between floors while enhancing the overall aesthetic. Nowadays, floating stairs have become a hallmark of modern architecture, known for their sleek and minimalist aesthetic that adds an open, airy feel to any space. However, the installation of floating stairs is a complex project that requires careful planning, precise measurements, and solid construction skills.
🔥In this comprehensive guide, we'll walk you through the essential steps of installing floating stairs, covering everything from preparation to final touches.
If you’re a beginner looking to save time and effort on stairs installation, you may opt for Muzata’s professional team to design and install your staircase, offering a seamless one-stop service tailored to your needs. For DIY enthusiasts eager to take on the project themselves, or contractors and designers seeking in-depth technical details, this guide is for you. Let’s get started!

Preparation and Planning
Effective preparation is the cornerstone of a successful floating stair installation, particularly for those new to construction projects. Here’s how to begin:
Design the Staircase: Draft a rudimentary blueprint, calculating the total rise (vertical distance from the base floor to the upper landing) and run (horizontal span across the floor). If you want to save time and effort, you can also fill out our free design form. Muzata's professional design team is always at your service.
Verify Building Codes: Consult the IRC, IBC, or your local building authority to ensure compliance with U.S. specifications, such as a minimum stair width of 36 inches and sufficient load-bearing capacity. 📌Securing a building permit may be requisite, so don’t overlook this administrative step.
Assemble Materials and Tools: Procure treads (available in wood, steel, or glass), a steel stringer (single or double configuration), handrail components, spindles, structural-grade fasteners (bolts or screws), and essential tools: a power drill, circular saw (for minor adjustments), spirit or laser level, measuring tape, pencil, wrench, and personal protective equipment (e.g., gloves, safety goggles).
Determine Structural Support: Select between a single stringer, positioned centrally for a streamlined aesthetic, or double stringers, spaced symmetrically for enhanced stability in wider applications. The single-stringer approach demands precise alignment, while dual stringers provide additional robustness.
With preparations in place, let’s proceed to the installation process.
How to Install Stair Stringers
Stringers serve as the primary structural framework, either as a solitary central beam (single) or a pair of parallel beams (double), supporting the staircase’s integrity.
Establish Positioning: Measure and mark the stringer locations on the lower floor and upper landing. For a single stringer, align it at the midpoint of the stair width (e.g., 18 inches from each edge for a 36-inch stair). For double stringers, position them equidistantly from the edges (e.g., 6-8 inches inward). 📌Utilize a level to ensure vertical and horizontal accuracy.
Secure the Stringers:
● Single Stringer: Place the steel beam at the designated mark. Drill into the concrete substrate and anchor it with heavy-duty concrete fasteners (e.g., expansion bolts). At the upper end, affix the stringer to the landing using steel brackets and structural bolts, ensuring a firm connection.
● Double Stringers: Position the two beams at the marked locations, maintaining parallelism. Secure each to the floor and landing with identical anchoring methods, reinforcing the framework’s stability.
Assess Stability: Apply downward pressure (e.g., by stepping on the stringer) to verify rigidity. If any deflection occurs, reinforce connections by tightening fasteners or adding supplementary support.

How to Install Stair Treads
Treads are the horizontal walking surfaces, but they require stair supports (brackets or plates) to be installed first for proper anchorage.
Install Tread Supports: For floating stairs, tread supports are essential for securing the treads and ensuring their stability. These frames should be attached to both the stringers and the treads to create a solid, secure connection.
Verify Supports: Use a level to ensure each tread support is horizontal and evenly spaced, adjusting as needed to maintain uniformity.
Attach Treads: Confirm custom treads meet specs. Place each tread onto its support.
● Single Stringer: Center the tread on the support and secure with bolts or screws through the bracket into the tread’s underside.
● Double Stringers: Rest the tread across both supports and fasten to each bracket with bolts or screws, ensuring full contact.
Ensure Levelness: Check each tread with a level, tweaking bolts or adding shims if it’s off-kilter.
Finish: Apply a protective coating (e.g., polyurethane for wood) if not pre-finished, allowing it to dry thoroughly.

How to Install Stair Handrails
Handrails are essential for safety and mandated by IRC R311.7.8, offering support during ascent and descent.
Define Height and Path: Position the handrail 34-38 inches above the tread nosing, marking its trajectory along the wall or stringer with a level for consistency.
Mount Brackets:
● Wall-Mounted: Locate studs using a stud finder, then secure brackets along the marked path with structural screws.
● Stringer-Mounted: Affix brackets to the stringer (the outer one in a double configuration) using bolts or equivalent fasteners.
Install the Handrail: Position the handrail atop the brackets and fasten with screws, ensuring a graspable profile compliant with standards.
Test Integrity: Apply lateral force to verify the handrail’s stability, tightening connections if any movement is observed.
How to Install Stair Spindles
Spindles are vertical balusters that provide lateral safety, commonly configured as slender metal rods or glass panels.
Designate Placement: Space spindles to comply with IRC R312.1, ensuring no gap exceeds 4 inches. Mark their positions along the treads or a base rail using a measuring tape and pencil.
Install Base Anchors:
● Tread-Mounted: Drill pilot holes at marked locations and secure spindle bases with screws or adhesive, confirming verticality with a level.
● Base Rail Option: Attach a horizontal rail to the stringer or floor using brackets and screws, then affix spindle bases to the rail.
Attach to Handrail: Measure the height to the handrail and trim spindles accordingly. Secure them to the handrail’s underside with screws or compatible fittings.
Confirm Alignment: Utilize a level to ensure spindles are plumb, adjusting as necessary to maintain uniformity.
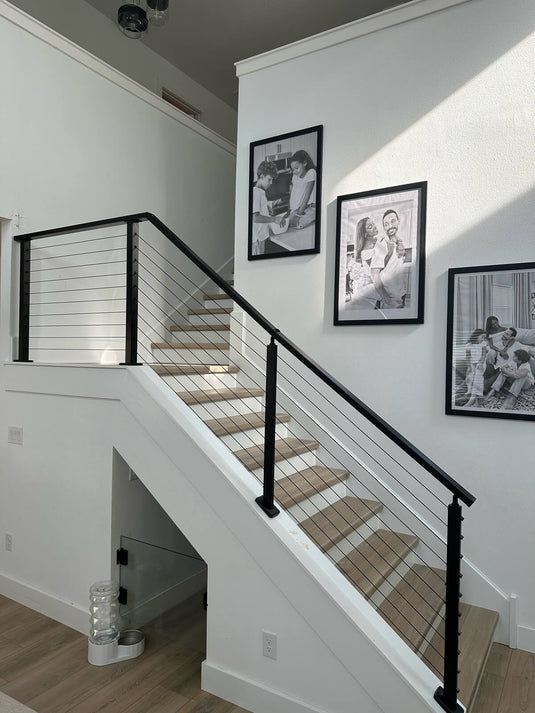
 Photo credit: @Palette Architecture on houzz
How to Install Stair Runners
A stair runner, a longitudinal carpet strip, enhances traction and comfort, though it’s an optional feature for floating stairs.
Measure and Trim: Calculate the staircase’s total length, adding an additional 12 inches for anchoring. Cut the runner to a width of 24-36 inches using a utility knife.
Prepare Surfaces: Clean treads to ensure adhesion of fasteners or adhesive.
Install Padding (Optional): Cut padding to fit each tread, securing with staples or adhesive tape to provide a cushioned underlay.
Secure the Runner:
● Begin at the base, folding the end under and fastening it to the initial riser with staples or adhesive. Extend the runner over each tread and riser, anchoring at each step.
● Maintain tension throughout to prevent slack or wrinkling.
Finalize Edges: Fold the top end under and secure it, trimming excess at the base and capping with a metal strip or additional fasteners.
Final Steps and Safety Verification
Conduct Inspection: Examine all components to ensure secure attachment and level orientation.
Perform a Trial: Traverse the staircase to assess structural integrity and comfort, noting any instability.
Enhance Presentation: Apply finishes as required, tidy the workspace, and consider integrating under-tread illumination for aesthetic appeal.

Stair Installation Cost
The cost of stair installation can vary depending on factors such as the materials used, the complexity of the design, and whether you hire a professional or complete the installation yourself.
Materials Costs: The type of material you choose for your floating stairs will significantly impact the cost. Wood treads are generally more affordable than metal or glass treads. The cost of the stringers, brackets, and handrails will also contribute to the overall price.
Labor Costs: If you hire a contractor to install your floating stairs, labor costs will add to the overall cost. Professional installers typically charge $50 to $100 per hour, depending on the complexity of the project.
Additional Costs: Additional costs can include stair lighting, custom handrails, or any unexpected modifications needed during installation. Be sure to budget for these extras to avoid surprises
You can also opt for Muzata floating stairs. We offer a professional, one-stop service, providing high-quality materials, expert consultation, and complete installation support. With Muzata, you can streamline the process, ensuring a seamless and hassle-free installation experience for your floating staircase project.

Conclusion
Installing floating stairs is a rewarding yet challenging project that can transform any space with its sleek, modern design. With proper planning, tools, and materials, even DIY enthusiasts can create a floating staircase that’s both functional and visually stunning.
Attention to detail is key—accurate measurements, secure components, and adherence to safety codes will ensure success. While it requires patience and skill, the result will be a striking architectural feature that elevates your home. Ready to start? With this guide, you’re all set to begin your staircase installation with confidence.