CA
CATABLE OF CONTENTS
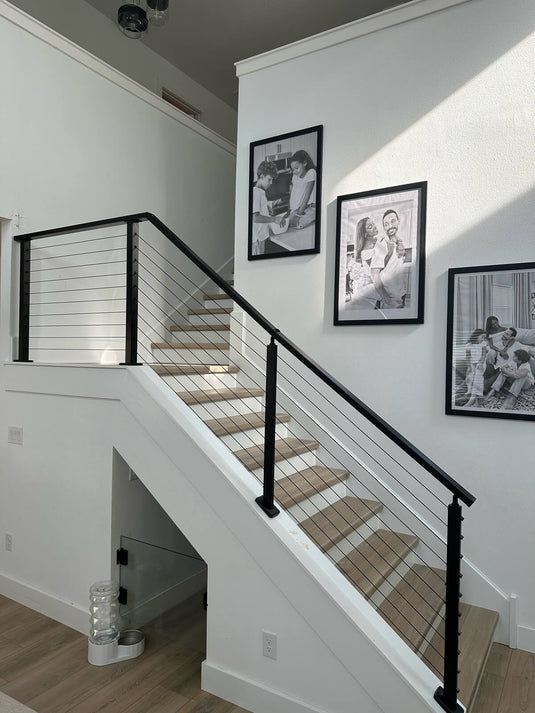
How to DIY Floating Stairs: Materials, Tools, and Best Practices (2025)
Floating stairs are a real style statement, bringing a modern, sleek touch to any home. That minimalist look, with the treads seemingly floating magically, is undeniably cool. But doing it yourself is not like hanging a picture frame—it takes careful planning, the right materials, and a good understanding of construction principles to ensure that it is safe and done right. If you are ready for an expert-level DIY project, this tutorial guides you through the fundamentals.

Plan Your Floating Stairs Project
Start by seeing if floating stairs are even a possibility in your location. You need a sturdy wall to which you can attach the hidden supports—a typical interior wall with dense wood studs. Calculate the total vertical rise (floor to finished upper floor level) and the horizontal run you have available. This will determine the number of steps and the angle. Consider the width you'd like; wider stairs are more gracious but require heavier supports. Rough out your designs, considering the style you're aiming for overall—rustic wooden treads or glossy painted ones?
Review your local building codes before you buy anything. Codes dictate minimum tread depth, maximum riser height (vertical distance between treads), minimum width, and, notably, when and where handrails must be used (sometimes on stairs with more than a few risers, even if it takes away from the "floating" appearance). Fold these requirements into your completed design. Failure to meet code can result in inspection failures and significant safety hazards. This step is not optional.

Materials Needed for Floating Stairs
Choose the Right Materials
The "floating" effect relies on hidden support. For DIY, this is usually heavy-gauge steel brackets custom-designed for floating stairs or a custom steel stringer bolted securely into the wall studs. The treads themselves are usually solid, thick hardwood (oak, maple, or walnut) for strength and looks, at least 1.5 inches thick, sometimes more. While metal or glass treads can be found, they introduce a great deal of complication and cost, typically placing them out of the typical DIY range. Choose materials that are rated for the load your stairs will be carrying.
Sourcing Materials
Thick hardwood treads can often be sourced from lumberyards specializing in hardwoods or sometimes ordered online. The critical steel support brackets or stringers might need to be purchased from specialized stair part suppliers online or potentially fabricated by a local metal shop if you provide detailed drawings. Ensure all fasteners (lag bolts, structural screws) are heavy-duty and appropriate for securely mounting into wood studs. Don't skimp on fastener quality or size.
Tools Required for Floating Stair Construction
This project requires more than basic hand tools. You'll absolutely need:
- A high-quality electronic stud finder (deep scanning preferred)
- Multiple levels (a long 4-6 ft level and a shorter torpedo level)
- Heavy-duty drill/driver and an impact driver
- Appropriate drill bits and driver bits
- Sockets or wrenches for lag bolts
- Measuring tape
- Miter saw (for cutting treads accurately)
- Circular saw (potentially for modifying framing if needed, use with caution)
- Pencil and marking tools
Don't even start without proper safety gear. This includes safety glasses (non-negotiable), sturdy work gloves, hearing protection (especially when using power saws), and dust masks (sanding creates a lot of dust). Wear appropriate clothing and footwear – no loose items that could get caught.
Step-by-Step Floating Stair Construction Practices
1. Prepare the Site
Clear the entire work area. Use your stud finder meticulously to locate the exact center of each wall stud where the supports will mount. Mark these locations clearly. Double-check your measurements for rise, run, and tread placement according to your plan and code requirements. Mark layout lines on the wall for the top and bottom of the support structure and potentially each tread location. Accuracy here prevents major headaches later.
2. Build the Structure (Support System)
This is the most critical phase. Securely mount your steel brackets or stringer to the wall studs using heavy-duty lag bolts or structural screws specified by the bracket manufacturer or your engineer/plan. Ensure the structure is perfectly level and plumb. Each bolt must go deep into the center of a solid wood stud—attaching only to drywall or plaster is completely inadequate and dangerous. Follow the manufacturer's instructions precisely for spacing and fastener types. This hidden structure carries all the weight.
3. Install Treads
Once the support frame is in place, you may then install the treads. These usually go on or bolt onto the extending arms of the brackets or stringer. Ensure every tread is level front-to-back and side-to-side. Secure them using the recommended hardware of the manufacturer. Space the treads evenly apart between (riser height) as per your plan and building codes in your area. A jig or template will help ensure uniformity.
4. Finish Touches
After the treads are securely installed, finishes can be applied. Sand wood treads level, starting with coarse-grit sandpaper and advancing to finer sandpaper. Apply your choice of finish—stain and polyurethane or heavy-duty paint. Multiple applications of a hard-wearing sealer like polyurethane are recommended, especially for stairs in high-traffic areas. Install handrails at this time if code mandates or you desire them for safety, installing them firmly as well.

Floating Stair Safety Considerations
Ensuring Structural Integrity
Safety cannot be overstated. The entire system relies on the secure attachment of the hidden support structure to your wall framing. Double-check every fastener. The stairs must be able to support substantial weight — for residential applications, building codes typically require them to withstand a 300-pound concentrated load and 40 pounds per square foot of uniform load. After installation, carefully test the stairs by applying weight gradually before regular use.
Professional Consultation
Floating stairs are an advanced structural project. If you have any doubts about your wall's framing adequacy, load-bearing capacity, or the proper installation method, consult a qualified structural engineer or an experienced contractor before you begin or to inspect your work. Getting professional verification is worth the cost for peace of mind and safety. Never guess when it comes to structural support. Remember code compliance for railings and dimensions.
Conclusion
Building DIY floating stairs is a challenging but potentially rewarding project that adds significant modern flair to your home. Success hinges on meticulous planning, using the right materials (especially for the hidden supports), precise execution, and an unwavering focus on safety and structural integrity. Always prioritize safety checks and code compliance, and don't hesitate to seek professional guidance. Take your time, double-check your work, and enjoy the stunning result of your efforts. Built any floating stairs? Share your tips or questions below!