CA
CATABLE OF CONTENTS
Tips for Installing Budget Cable Railing

You’ve bought your house to enjoy those fabulous views around from your balcony or deck but once you take out your favorite beverage you are merely able to stare at that dirty glass or the picket of the railing. So you’re looking to renovate the exterior of your house and are feeling overwhelmed to get rid of that old shaky gray fence at the deck, blocking the gorgeous views of open spaces around by doing it yourself?

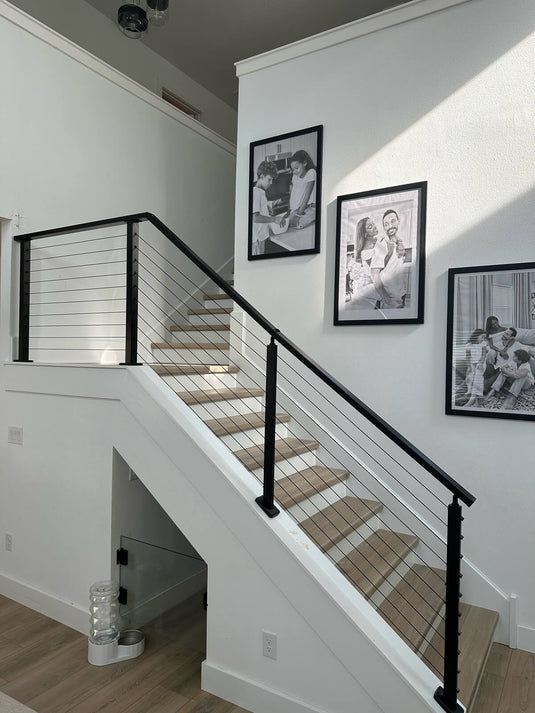
The best alternative for all these flaws is cable railing. Over the past few years, owing to a plethora of benefits, cable railings have grown in popularity. Unlike traditional wood or metal railings, cable railings almost eliminate maintenance headaches and are best to achieve unobstructed views across decks, balconies, and stairs. In a cable railing system, horizontal cables are used across guard rails and handrails to provide safety in place of traditional spindles, glass, mesh, etc. for infill.
It is less costly than other types of railing because of less amount of material required per linear foot. It is not only budget-friendly the best part is; you can easily transform your railings yourself by the DIY way. Can it be done? Absolutely!
So in this read, I’d like to reveal some of the ingenious tips that would help you in installing cable railing with a budget.
Make a Plan for Staircase or Deck

If you want to install that awesome cable railing without a fuss or frustration – you need to prepare a workable plan. Carryout the precise measurement around the edge of your deck, balcony or stairway and prepare a rough sketch showing all the information. You should also be deciding how much the height of the handrail you need to install. In such a way you would be able to estimate the correct amount of material you need to purchase.
As you’ve never been into cable railing before you may find it difficult to select the type of cable railing system. If you already have wooden posts around, I’ll suggest you make use of wooden posts railing systems.
You can easily upgrade balusters and engage them in your new cable railing project. To reduce cable deflection or bending you can use stainless steel intermediate posts that will make a big impact on your home. Stainless steel offers a classy, expensive-looking and elegant finish you can install without much hassle. If you want to further reduce the cost of your project, you can go for the aluminum posts that are half the costs of stainless steel and offers strength and safety that are beyond the code requirements.
Tools Required
Regarding the tools you require for cable railing installation, you can either purchase them one by one or you can go for a complete kit that has all the specialized tools for any cable railing projects. You require some basic hand tools like pliers, a power drill, and a driver. Besides this, you need cable cutters, crimping tools, wrench, and other specialized tools for tensioning or inserting the cables. As the installation process is the same for all types of cable railing networks; so all your tools will work for wooden, metal, or aluminum posts. Cable cutters are an expensive tool so if you’re not frequently into DIY projects, it is recommended to rent them from your local rental store to keep things within budget.

Estimating the Amount of Cable Required

After selecting the material for the posts you have to figure out how much cable you require based on the measurements taken. You can use 4x4 or 6x6 wooden posts or 2x2 or 4x4 metal posts or maybe a combination of these. The posts need to be properly mounted and for each corner use 4x4 metal posts so you can make a 90 degree turn inside the posts. For interior runs use 2x2 metal posts in between. I recommend you space posts at a maximum of 42” apart to avoid deflection.
Make a rough sketch of the spacing of these posts and then you’ll be able to determine how much cable you need. For each run of the able, measure one run of the cable, and add afoot. Multiply the length with several cables based on the height of the railing.
Regarding the number of cable rows needed you should consult your local building and municipality code. Most of the building codes require you to space cable strings not more than 3 inches so a ball of 4-inch diameter may not be able to pass through two lines of cables. You should evenly map out the number of cables and space them accordingly on the posts.
Drill holes through the posts
Now that you’ve determined the number of rows for cable needed, mark the spots where cable needs to be drilled through the posts. Drill through the posts and securely mount the posts at the measured distances. Spacing is very crucial in the success or failure of your DIY cable installing project so, carefully mark the post spacing before mounting.
Mount Posts and Install cable wires
The next step in the process is to run the cable through the posts. The process would be straightforward and running the cable would be smooth sailing if you’ve carefully drilled the holes through.
Tighten and trim the cable wires
The last step is to mark the length of the cable that needs to be trimmed and cap the cables after tightening. But make sure to start tightening from the very middle and move outwards one by one alternatively.
If you've purchased a pre-assembled kit, all this trimming process would be a breeze. Just find that push and lock or pull and lock fitting as appropriate, trim the ends using cable cutters, and cap them with the supplied caps.
The Bottom Line
The installation of a cable railing system doesn't require many detailed steps and accuracy. It's a perfect type of DIY venture and the final product is well worth it!