CA
CATABLE OF CONTENTS
How to Calculate Materials for Your Cable Railing System?
Accurately estimating the materials for a cable railing system is a key step in ensuring the smooth progression of a project. Precise material estimation can greatly improve work efficiency, avoiding additional costs and time delays caused by material shortages or excess. It helps reduce waste and save costs while ensuring the structural strength and safety of the railing system, all while meeting relevant regulations and design standards. Therefore, mastering the correct material estimation method, just like using a cable railing calculator, is crucial for the success of every cable railing project.
This article will introduce the various components used in a cable railing system and share how to correctly estimate the corresponding material quantities. It will only take a few minutes to read, but it will be of great help to your project.

What materials need to be estimated for a cable railing system?
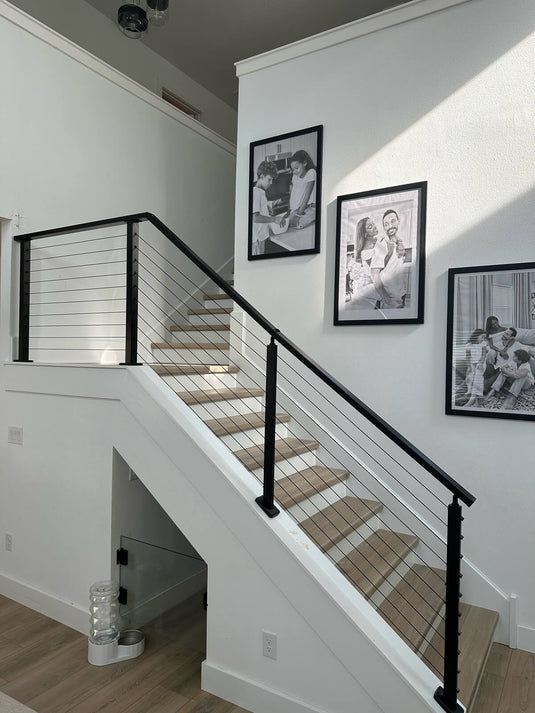
Posts
As the supporting components of a cable railing system, posts are typically made from metal or wood materials. Depending on the installation location, posts are generally categorized into three types:
 |
 |
 |
- Level Post: Suitable for the ends and middle sections of horizontal areas such as decks or terraces.
- Angle Post: Suitable for the ends and middle sections of sloped areas such as stairs.
- Corner Post: Suitable for horizontal corner areas of decks or terraces.
After understanding the types of posts, the next important consideration is the post spacing:
💡What is the best post spacing?
Typically, for wooden posts, the recommended spacing is 6-8 feet; for metal posts, the spacing for a single section should not exceed 5 feet, and for continuous sections, each segment should not exceed 54 inches. These recommendations aim to prevent excessive spacing between posts, which could cause issues such as wire rope sagging or post bending, ensuring safety and compliance with load-bearing requirements specified by regulations.
For Muzata cable railing spacing, it is recommended to place a post every 3 feet 3 inches. Since the Muzata handrail length is 6 feet 6 inches, this design allows two sections of posts to perfectly match with one handrail. This arrangement not only reduces cutting and waste but also ensures a more even post distribution, enhancing the overall aesthetic.
Handrail
As a key component of the cable railing system, the handrail is typically positioned at the top of the railing, providing users with grip support to ensure safety while walking or going up and down stairs, while also serving a decorative purpose.
 |
 |
 |
The key to estimating the material quantity for the handrail lies in the total length of the handrail. According to the project plan, the handrail is typically installed along horizontal, corner, and sloped sections, so it is essential to accurately calculate the length of each handrail segment.
The height of the handrail has little impact on the estimation of handrail material usage. Typically, the handrail height depends on the height of the posts, and the post height is determined by regulatory requirements. Therefore, the total length of handrail material required is not affected by the handrail height.
The installation of handrails in a metal cable railing system needs to take the position of the posts into account. Each Muzata handrail is 6 feet 6 inches in length. If the posts are spaced at 3 feet 3 inches apart, one handrail can be used between two posts. If the spacing is smaller, the handrail can be spliced to cover the section; if the spacing is larger, a separate handrail is needed.
For example, if there are two sections of railing requiring handrails to cover 36 inches and 32 inches, these two sections can be spliced together using one handrail. If there is a remaining section that cannot be spliced, a separate handrail will be required for that part.
It is particularly important to note that the length of the stair railing handrail should be calculated based on the height and width of the stair treads, typically determined using the hypotenuse formula.
By following this planning, the total length of the required handrail can be accurately calculated, allowing for an estimate of the material quantity needed.
Cable
As an essential component in the cable railing system that bears and connects various parts, cable typically serves as the "fencing" element of the railing. It not only enhances the structural strength and safety of the railing but also maintains its openness and transparency, creating a more modern and minimalist visual effect.
 |
 |
 |
When estimating the material for cable, it is important to consider an allowance. This is to account for any errors during cutting that could lead to insufficient material. It is generally recommended to allow for a 10% surplus of cable.
Based on this, a calculation formula can be used to determine how much cable needs to be purchased.
Required cable length = Total measured length of the project (feet) × Number of rows of holes × 1.1 (allowance) = Cable length to be purchased (feet)
It is important to note that the cable length for sloped areas such as stairs should be calculated based on the width and height of the stair treads using the hypotenuse formula.
Cable Railing Hardware
The cable railing hardware is a key component used to connect and tension cables. There are typically three types of hardware: tensioner, fixed end, and a kit that includes both the tensioner and fixed end. Cable railing hardware is commonly applied to the starting and ending posts of the railing system.
 |
 |
 |
When using the cable railing hardware, it is important to note that typically, one tensioner is used with one fixed end, or two tensioners can be used. However, two fixed ends cannot be used alone, as the fixed end is only responsible for securing the cable and does not tension it.
In addition, when using a tensioner, it is important to note its maximum tensioning distance. For example, the maximum tensioning distance for the Muzata CB04 tensioner is 20 feet, so if two Muzata CB04 tensioners are used, the maximum tensioning distance is 40 feet. If paired with a fixed end (such as the Muzata CB17), the maximum tensioning distance is 20 feet.
In the corner sections, to achieve a single-post corner design, it is common to use one tensioner paired with one fixed end on the corner post. In the horizontal-to-stair transition sections, to achieve a single-post transition design, it is common to use two fixed ends on the transition post. This configuration ensures the stability and safety of the railing system, while properly adjusting the tension of the cables and maintaining aesthetic appeal.
Accessories
Accessories typically play a role in connecting, fixing, adjusting, and decorating within a cable railing system. By properly configuring the accessories, the assembly and adjustment of the railing system can be completed quickly.
When estimating accessory materials, to help you better understand, we have categorized the accessories based on different sections, such as post accessories, handrail accessories, and hardware accessories. To enhance the user experience, Muzata has included some essential accessories in the main product package, so you don't need to purchase them separately.
Post Accessories
Such as side-mount spacer, etc.
Side-mount spacer are mainly used in side-mounted installations to help level the protruding edges of platforms or stairs, ensuring a secure installation of the posts.
Handrail accessories
Such as corner connectors, vertical pivot connectors, and level pivot connectors.
 |
 |
 |
- Corner connector: Used at the corner of the handrail to provide connection and fixation.
- Vertical pivot connector: Used to transition between the horizontal and sloped sections of the handrail, ensuring a stable connection.
- Level pivot connector: Suitable for adjusting irregular angles, primarily used in horizontal sections to ensure smooth handrail installation.
Cable Railing Hardware Accessories
such as angled washers, protective sleeves, adhesive sleeves.
 |
 |
 |
- Angled washers: Used in stair sections to fill the gap between hardware and posts, ensuring a tight connection.
- Protector sleeves: Effectively reduce wear on the cable, extending its lifespan.
- Adhesive sleeves: Primarily serve a decorative purpose, enhancing the appearance.
Not all projects will require all of the above accessories. The specific accessories and quantities needed should be selected based on the project requirements. After understanding the functions of these accessories, you can choose the appropriate ones according to the characteristics of the project, ensuring the smooth installation and use of the cable railing system.
Tools
Tools play a crucial role in the cable railing system, assisting with tasks such as cutting and connecting. Choosing tools that are easy to use and reduce effort can significantly improve work efficiency and reduce labor.
When installing a cable railing system, you need to be familiar with two commonly used tools: cable cutters and hydraulic crimping tool.
 |
 |
Cable Cutters
During installation, the cables need to be cut to the precise measured length. Cable cutters provide accurate cutting, ensuring that the cable length meets the design requirements.
Hydraulic Crimping Tool
The main function of the hydraulic crimping tool is to attach the end of the cable to the connectors. Using the powerful force of hydraulics, the tool securely fixes the connector to the cable, preventing slippage or loosening. This ensures the safety of the cable railing system, ensuring that the cable can withstand tension without failure.
👀Please note that the hydraulic crimping tool is only required if you purchase crimp-style cable railing hardware. If you purchase the non-crimp-style hardware, this tool is not necessary.
What do you need to pay attention to?
1. Precise Measurement
Before starting the material estimation, measure the area where the railing system will be installed. Accurate measurements will help avoid material shortages or waste later on. Use professional tools to ensure precision.
2. Consider Environmental Factors When Choosing Materials
Select the appropriate materials based on the geographical location of the project (e.g., seaside, forest, outdoor, etc.). For example, in areas near the ocean, it is recommended to use T316 stainless steel, as it offers better corrosion resistance than T304 stainless steel. Additionally, the surface treatment of the material should also be considered. Generally, materials with a powder-coated finish offer better corrosion resistance than those with a brushed finish.
3. Ensure Material Compatibility
When selecting materials for a cable railing system, it's essential to ensure compatibility between different materials. For example, the hardware for a wooden post cable railing system differs from that of a metal post system. Therefore, when purchasing materials, it's crucial to pay close attention to ensure the correct components are selected, ensuring a smooth installation process.
4. Choosing the Right Quantity of Materials
When selecting materials, some items, such as posts, do not require an allowance. However, for materials like cable, it is recommended to allow for a 10% surplus to account for any cutting errors and ensure that there is enough material to complete the installation smoothly.
5. Seek Professional Help in a Timely Manner
If you have any doubts about the installation or material estimation of the cable railing system, it is recommended to consult Muzata's professional team. Muzata offers free design services, and our engineers will provide one-on-one support for your project, from product selection to installation and project completion, ensuring professional assistance every step of the way.
Conclusion

With precise calculations and the right material selection, you can ensure the safety and aesthetics of your railing system while effectively managing project costs. Simply add the necessary materials to your cart, and once they arrive, you’re ready to start your project. If you have any questions about material selection, don’t hesitate to seek professional support to make your project easier and more efficient.