TABLE OF CONTENTS
How to design an indoor loft railing with an industrial look?
In today's blog, we're going to build stunning loft decks step by step with DIY expert Zach from YouTube. During his build, he created an industrial-style loft railing using Muzata's stylish black steel railing. Let's get started on this amazing journey!
Zach's Discovery: Muzata's Black Steel Cable Railing
At Zach's house, he is preparing to construct a protective enclosure for his loft. Using an all-wood and airtight enclosure was not only aesthetically unappealing, but it didn't fit the industrial style he wanted.At his wits end, he found Muzata cable railings online and thought, "This is it!"

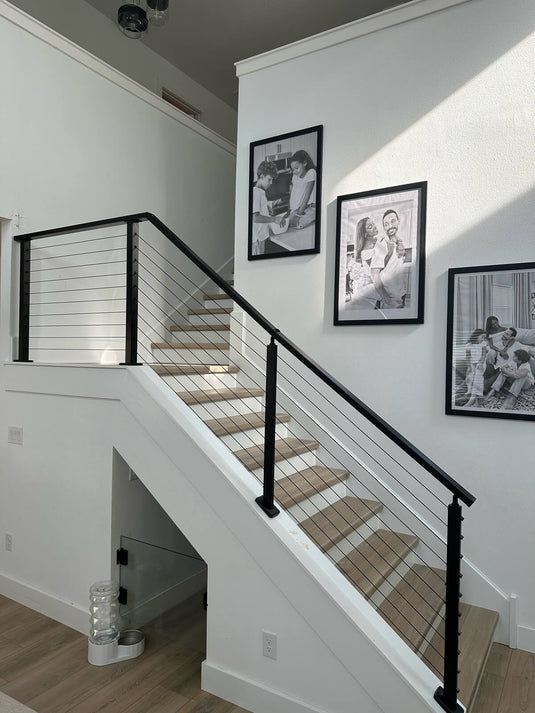
The black cable railing was exactly what he envisioned for his industrial style loft. With its sleek appearance, sturdy build, and straightforward installation process, Muzata's Black Cable Railing quickly becomes Zach's top choice. This railing perfectly embodies the essence of industrial design, incorporating metal elements like steel beams, iron fixtures, and aluminum trim, which not only enhance durability but also add a touch of rugged sophistication to the space.
Gathering Tools and Installing the Posts
Eager to get started, Zach gathers all the necessary tools and materials, including Muzata's cable railing, screws, brackets, and a drill. He starts by marking the exact locations where the railings will be installed, taking into account both safety requirements and aesthetic preferences. Then, using his drill and screws, he securely mounts the posts onto the loft's perimeter, ensuring they are level and straight. This step is crucial for ensuring the posts will sit flush and stable when installed.

Installing the Muzata Smooth Black Handrail
Next, Zach performs the installation of the Muzata Smooth Black Handrail. During his video installation, we noticed that he would use tape to mark where to drill and attach the handrail for ease of post-processing. This method is worthwhile to learn and will prevent us from making mistakes when aligning the railing posts. There are more tips in the video below:
Adding the Finishing Touches: Muzata Black Cables
Finally, with all the handrails safely in place, Zach put on the finishing touches: the Muzata black cables. Zach found this part of the process of installing the cable railing to be the more fun part. Zach and his girlfriend worked together to complete this part of the installation. They cut the cables to the desired length, leaving plenty of room for adjustment and flexibility. Zach threaded each cable through the bracket and used a special tool to pull it tight. This ensures a secure fit without sagging or swaying, even under the weight of multiple users. Zach gets excited with each completed section, and he can't wait to see the final result. This design makes his entire loft look more open and bright. “It couldn't have turned out any better it's amazing this is the biggest build I'vedone on the channel so far and it turned out so well” Zach said.

Muzata's Free Design Services for Your Dream Railing
With that, we followed in Zach and Muzata's footsteps and, built a stunning industrial style loft railing. From start to finish, the entire process was a pleasure and the end result is breathtaking. And, of course, Muzata offers a full range of free design services before you build your dream railing. If you're looking to add a touch of modern elegance to your outdoor space, consider Muzata's steel cable railings - they're sure to exceed your expectations!


