CA
CATABLE OF CONTENTS
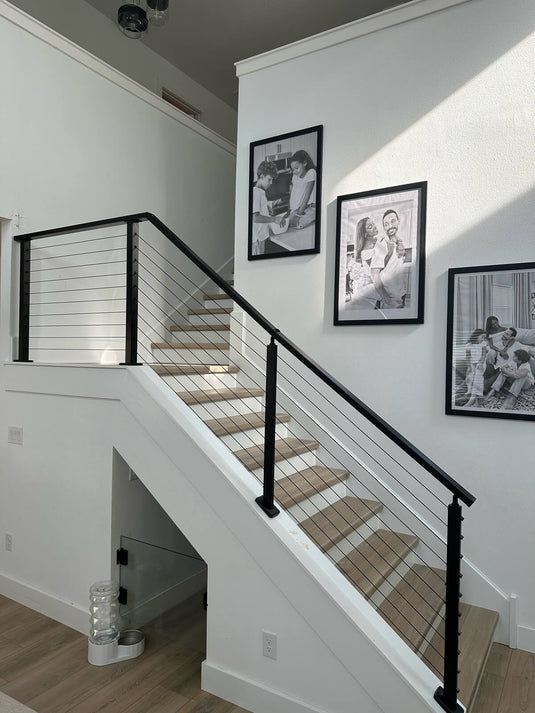
Precision Matters: How to Accurately Measure for Your Cable Stair Railing Project
A sleek cable railing can completely change the look of a staircase, making it feel open, modern, and stylish. But unlike a simple deck railing on flat ground, stairs bring a whole new challenge to the table: angles. Getting your measurements right for a cable stair railing isn't just a good idea—it's the one step you can't afford to mess up. It affects the safety, cost, and final look of your whole project.
This guide will walk you through it, step by step. We’ll cover the tools you need, the exact measurements to take, and the common slip-ups to avoid so you can get it done right the first time.

Why You Must Be Accurate When Measuring a Cable Stair Railing
On a flat deck, you can sometimes fudge a small measurement error. On stairs, even a tiny mistake can throw everything off. You have to be precise, and here are the three big reasons why. First is safety. If your angles or lengths are wrong, your cables won't be evenly spaced. This could create gaps that are too wide, failing the "4-inch sphere" safety rule and creating a real hazard.
Second, it's about the money. Cable and hardware aren't cheap. If you order the wrong amount of cable, you'll either come up short and have to place another order (and wait), or you'll have a bunch of expensive cable left over. Drilling a post in the wrong spot is also a frustrating and costly mistake to fix.
And finally, it's all about the look. The beauty of a cable railing is its sharp, clean, parallel lines. Bad measurements will leave you with cables that look saggy, uneven, or just "off," ruining that clean, professional look you were going for.

The Simple Tools Needed for Your Cable Stair Railing Project
You don't need a pro-level workshop, but a few basic tools will make this job way easier and much more accurate. Before you get started, grab these four things:
- A Good Tape Measure: Your 25-foot tape measure is your best friend here. Make sure the numbers are clear and the end hook is solid.
- An Angle Finder: This is a must-have for stairs. A cheap digital angle finder is quick and dead-on accurate, but an old-school bevel gauge and a protractor work just fine too.
- A Level: A 2-foot or 4-foot level is what you'll use to make sure your posts are perfectly straight up and down (plumb). This is critical for a strong frame.
- Pencil and Paper: Don't trust your memory. Write down every single measurement as you take it. A simple sketch of your stairs where you can label everything is a huge help.
How to Measure for Your Cable Stair Railing, Step by Step
This is how you get the key measurements for ordering parts and planning your install. The trick is to take it one step at a time and double-check everything.
Step 1. Measure the stair run length
Mark where your top post will be installed and where your bottom post will sit. Hook your tape measure on the inside face of these marked locations, then run the tape down the stairs, keeping it tight against the stair nosings. This measurement, taken on the angle, gives you the sloped length of your stair section. Note: this is a planning dimension, not the final cable length you’ll order.
Step 2. Find your stair angle
This step looks tricky but it’s actually simple. Place your angle finder flat on top of the stair nosings. The reading you get is the exact angle of your staircase. You’ll need this angle when drilling post holes so the cables pass through smoothly. Write that number down right away.
Step 3. Plan your post layout
Every stair run should have a post at the very top and the very bottom. If the distance between them is longer than about 4–5 feet, you’ll also need intermediate posts for support. Take the measurement from Step 1 and divide it into equal sections to decide where those middle posts will go. Mark these spots clearly so you can order the right number of posts.
Step 4. Calculate cable length
Don’t purchase cable based only on the run length you measured in Step 1. Instead, take the run length and multiply it by the number of holes (cable runs) in your posts. This gives you the total cable length required for your project. To avoid the inconvenience of running short or needing returns, add an extra 10% to this total as a safety margin. This way, you’ll have enough cable to cover any adjustments, miscuts, or unexpected situations during installation.

Common Mistakes to Avoid with Your Cable Stair Railing Measurements
Knowing where things can go wrong is half the battle. Steer clear of these common mistakes:
- Forgetting Posts Have Thickness: People often measure the distance between their posts. You have to remember that the cable runs through the posts, so you need to measure from the outside of the first post to the outside of the last one. Ordering about 10% extra cable also helps prevent issues caused by this miscalculation.
- Measuring Flat Instead of on an Angle: This is the #1 mistake. If you measure the horizontal "floor" distance, your cable will be way too short. Always measure along the actual slope of the stairs.
- Not Checking Local Codes First: Before you buy anything, do a quick search for your local building codes. They'll tell you the required railing height and the maximum gap you can have between cables (that 4-inch rule). Make sure your plan meets these requirements.
At the end of the day, a cable stair railing project is all about the prep work. Taking your time to measure carefully, and then checking it one more time, is the best thing you can do for a stress-free installation. A little precision up front will save you big headaches later and leave you with a stunning, safe railing that you can be proud of for years to come.
Get It Right the First Time
Not sure about your measurements or worried about ordering the wrong parts? Our free design service takes care of it for you
Get My Free Plan