CA
CATABLE OF CONTENTS
Beginner Pitfalls: Common Mistakes to Avoid When Using Cable Railing Kits
So, you’ve decided to upgrade your deck or staircase with a sleek, modern cable railing. Awesome choice! The clean lines and unobstructed views are hard to beat. And with so many great cable railing kits on the market today, it feels like a totally manageable DIY project, even for a beginner. But while these kits simplify the process, there are still a few common pitfalls that can trip you up. A little bit of know-how can save you a ton of headache, so let's walk through the common mistakes to avoid.
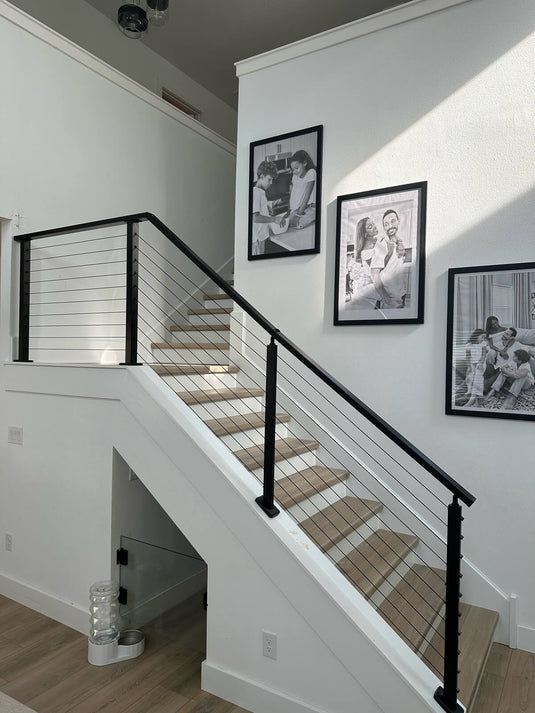
 Customer photo shared by Bill Pfleger
Mistake 1: Skipping the Homework Before You Buy
The excitement to get started is real, but jumping the gun is the fastest way to run into trouble. A successful cable railing installation begins long before you even open the box. A little bit of planning upfront will make the entire process smoother and save you from costly errors.
Not Checking Local Building Codes
This is a big one, so don't skip it. Building codes exist for one simple reason: safety. Your local municipality will have specific rules about railings, including required height (usually 36" or 42"), post spacing, and how much space is allowed between the cables. Often, codes require that a 4-inch sphere cannot pass through any opening. If your cables are too far apart, your beautiful new railing won't pass inspection, and you'll have to redo it. A quick search on your city or county's website or a call to the building department is all it takes.
Choose the Right Kit for Your Project
Next, make sure the cable railing kit itself is a good fit. Start by understanding the key parts of a cable railing system: posts, cables, hardware (like tensioners and protective grommets), and handrails. Then consider where you’ll install it—indoors or outdoors, on a deck, landing, or staircase, and whether your project includes corners. These details will guide you to the right kit. Finally, check that the kit includes clear installation instructions. Whether you’re doing it yourself or hiring a pro, good instructions are a lifesaver.
Unsure where to start?
Tell us about your project — Our experts offer 1-on-1 support and can quickly address your cable railing design needs.
Start My Project →Mistake 2: Using the Wrong Tools for the Job
You’ve got your kit, and you're ready to go. You head to the garage and grab that old pair of pliers from your junk drawer to cut the cable. Stop right there! Using the wrong tools is one of the most frequent mistakes a beginner makes, and it can ruin the clean, professional look you’re going for.
Stainless steel cable is incredibly tough. Trying to cut it with anything other than a dedicated cable cutter will result in a frayed, ugly mess that will be difficult, if not impossible, to feed through the small holes in your fittings. A proper cable cutter is designed to make a clean, sharp cut every time. Some cable railing kits may include the necessary tools, so check your package carefully. If not, invest in specialized tools. This small investment can significantly improve the quality of your cable guard installation. Don't miss out.
Mistake 3: The "Measure Once, Cut Twice" Problem
This classic DIY blunder is especially painful when working with cable railing. Unlike a piece of wood that you can patch or hide, once you cut that stainless steel cable too short, there's no going back. You just have to start over with a new, full-length cable.
Here’s the golden rule for a successful cable railing installation: feed the cable through one end post, through all of your intermediate posts, and all the way through the final end post before you make your final cut. Give yourself a few extra inches to work with, attach your final fitting, and then trim off the excess. This simple habit will prevent you from making a costly and frustrating mistake. The same principle applies to drilling—measure your hole spacing carefully and use a guide to ensure they are perfectly straight.
Mistake 4: Underestimating Cable Tension
Getting the tension right is the make-or-break step for your project's final look and safety. It's a delicate balance that many beginners struggle with.
- Too Loose: If your cables are too loose, they'll sag. Not only does this look sloppy, but it's also a serious safety hazard. The railing won't be secure, and the gaps could become large enough to violate building codes. You want the cables to be taut with very little flex when you press on them.
- Too Tight: On the other hand, going overboard with tension can be just as bad. Overtightening the cables puts immense strain on your end posts, causing them to bow inward, warp, or even crack over time. This can compromise the entire structure of your railing.
Think of it like tuning a guitar string—you want it just right. When tensioning, work your way from the middle cable outward, alternating between the top and bottom to apply pressure evenly across the posts. Take your time and check the tension and post straightness as you go.
 Customer photo shared by Water Farms
Mistake 5: Ignoring Your Post Structure
The sleek, minimal look of a cable railing is only possible because all that tension is being managed by a strong frame. The cables themselves are strong, but they are only as sturdy as the posts they are anchored to. A common oversight is not giving your posts, especially the corner posts, the support they need.
Corner posts are doing double duty—they are anchoring two separate runs of cable pulling in different directions. This requires extra reinforcement, often called double-posting or using a larger, more substantial post. The same goes for your main end posts where the cable runs terminate. Without a solid anchor, all your hard work on tensioning will be for nothing as the posts slowly give in to the pressure. Most cable railing kits will include guidance on this, so be sure to read it carefully.
Conclusion
Installing a cable railing is an incredibly rewarding project that can dramatically transform your space. Don't let this list of potential mistakes scare you! By doing your homework, using the right tools, and being patient with your measurements and tensioning, any beginner can achieve a stunning, professional-looking result. These cable railing kits are designed to be user-friendly, and with a little care and attention to detail, you’ll be enjoying that beautiful, unobstructed view in no time.