CA
CATABLE OF CONTENTS
When and How to Replace Your Deck Railing Cable: A Homeowner’s Guide
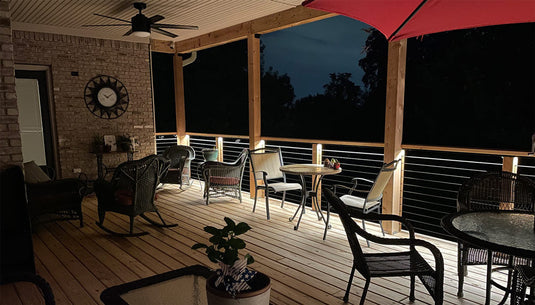
A deck cable railing system gives that sleek, contemporary design many of us enjoy, while it keeps those backyard vistas wide open. It's a great option. Those wires won't endure forever, however, just like everything else that's outside. To keep your deck safe and looking good, you need to know when to repair the railing cable and how to do it. Let me share some tips I've learned from working on a few home renovation projects.

Signs It's Time for Deck Railing Cable Replacement
The greatest thing you can do here is check things out often. Don't wait for a major breakdown; keep an eye out for these symptoms that your deck railing cable could require work:
1️⃣ Visible Rust or Corrosion
Stainless steel is resistant to rust, although it isn't completely immune to it, particularly in coastal locations or when lower-quality materials were utilized. Any big rust areas, especially around fittings or where the cable goes into posts, are a big red signal. The cable becomes weaker as it rusts.
2️⃣ Fraying or Broken Strands
Individual wires (strands) making up the cable can break due to wear, impact, or excessive tension. Even a few broken strands compromise the cable's overall strength and can create sharp, dangerous edges. This is a clear indicator for railing cable replacement.
3️⃣ Kinks or Sharp Bends
A kinked cable is a weakened cable. Kinks create stress points that are much more likely to fail under load. If you see sharp bends or kinks that weren't there originally, replacement is wise.
4️⃣ Excessive Sagging or Looseness
While some minor re-tensioning might be needed over time, if your cables are consistently sagging significantly even after attempts to tighten them, it could indicate stretched cables, failing tensioners, or issues with your posts. If the cable itself is stretched beyond its elastic limit, it needs replacing.
5️⃣ Damaged or Corroded Fittings
The tensioners, terminals, and other hardware are just as important as the cable. If these components are cracked, stripped, heavily corroded, or otherwise damaged, they can lead to cable failure. Sometimes you might only need to replace a fitting, but inspect the cable ends carefully as well.
What Affects Your Deck Railing Cable's Lifespan?
Not all deck railing cable systems age at the same rate. The biggest factor is the quality of the materials used in the first place. Marine-grade 316L stainless steel will outlast 304 stainless, especially if you're dealing with salt spray or high humidity. The quality of the tensioners and end fittings matters just as much as the cable itself.

Your local environment plays a huge part too. Coastal air, industrial pollutants, and even frequent dramatic temperature swings can put extra stress on the materials. And finally, the original installation quality is crucial. Cables that were over-tensioned from the start or fittings that weren't properly secured can lead to premature failure. Regular cleaning to remove grime and salt can also help extend its life.
Tools and Materials for Railing Cable Replacement
A successful railing cable replacement starts with having the right gear on hand. Don’t skimp here, as the right tools make the job safer and easier.
The Right Cable
Ensure you get the correct diameter and type of stainless steel cable. Measure your runs carefully, then add a bit extra – it’s better to have too much than too little.
Fittings – New or Reused?
Inspect your existing tensioners and terminals. If they’re in pristine condition, you might reuse them. However, if corrosion was an issue, or if they’re showing any wear, it’s often best practice to replace them along with the deck railing cable.
Essential Tools 🧰:
| ⮕ Specialized Cable Cutters | You absolutely need cutters designed for hardened stainless steel wire rope. Your regular wire snips won't make a clean cut and will likely get damaged. |
| ⮕ Crimping/Swaging Tool | If your chosen fittings require crimping or swaging, get the correct tool for the size and type of fittings. Renting is an option if you don't want to buy. |
| ⮕ Wrenches/Spanners | For your tensioners and any bolted connections. |
| ⮕ Safety Gear | Non-negotiable! Safety glasses are a must to protect from flying cable strands, and heavy-duty gloves will save your hands. |
⮕ A good measuring tape and a marker.
⮕ Penetrating oil can be a lifesaver if old fittings are seized up.
Step-by-Step Guide to Railing Cable Replacement

① Clear the deck area and ensure no pets or children are around while you work. Wear your safety gear.
② Carefully loosen the tensioners on one of the old cable runs. Once slack, disconnect the cable from the end fittings. If fittings are seized, penetrating oil might help. Remove the entire cable run. It's often best to replace one cable run at a time to maintain some integrity in the railing system.
③ Using an old cable run as a template (if it was the correct length) or by carefully measuring between your posts, determine the length needed for the new deck railing cable. Add a little extra for fitting into terminals. Cut the new cable cleanly with your specialized cutters.
④ Attach the appropriate terminal fittings to one end of the new cable according to the manufacturer's instructions (this might involve swaging, using swageless fittings, or crimping).
⑤ Carefully thread the new cable through all the intermediate posts and attach the prepared end to its anchor point or tensioner on one end post.
⑥ Pull the cable taut (but not fully tensioned) to the other end post. Mark where the cable needs to be cut to fit into the second terminal/tensioner. Cut it and install the second fitting.
⑦ Gradually and evenly tighten the tensioners. The goal is to have the cable taut enough that it doesn't sag excessively (check local building codes for specific deflection limits – often, it shouldn't deflect more than a few inches under a specified pressure) but not so tight that it puts undue stress on your posts or the cable itself. Work from the middle cables outwards, or top to bottom, to ensure even tension across the system.
⑧ Check the tension and appearance. Repeat the process for all remaining cable runs needing railing cable replacement.
Tips for a Successful Deck Railing Cable Replacement
Avoid the common pitfall of over-tensioning your deck railing cable. It should be firm, but not like a guitar string. This protects your posts and fittings. Always ensure you're making clean cuts on the cable; frayed ends are a pain to work with and look unprofessional.
A little anti-seize lubricant on the threads of your stainless steel tensioners can make future adjustments much easier and prevent galling (where the threads bind up). And critically, before you even start, check your local building codes. They’ll have specific requirements for railing height, cable spacing, and maximum allowable cable deflection. If any part of this feels beyond your comfort zone, or if your deck posts themselves seem wobbly or damaged, calling in a professional deck builder or railing installer is always a smart move.

Taking care of your deck railing cable with timely inspections and proper railing cable replacement when needed will keep your deck safe, looking great, and ready for years of enjoyment. It’s one of those home maintenance tasks where doing it right really pays off.