CA
CATABLE OF CONTENTS
How to Install a Deck Railing: DIY Guide for Homeowners
Getting Started with Your Muzata Cable Railing System: Unboxing and Preparation
Congratulations on your purchase of the Muzata Cable Railing System! Before diving into the installation of your deck railing systems, it's crucial to properly unbox and organize your materials to ensure a smooth, frustration-free process. Here's how to install deck railing:
1. Inspect the Package
Upon receiving your shipment before installing deck railings, carefully inspect the box for any visible damage during transit. Open the packaging and verify that all components are intact and free from bends, dents, or scratches. If you notice any issues, contact Muzata customer support immediately for assistance.
2. Verify and Categorize Components
Muzata all-in-one cable railing kit includes everything you need for a sleek, modern installation. Lay out all parts and cross-check them with the packing list or user guide to confirm you have:
Posts: Vertical supports that anchor the railing.
Handrail: Provide a secure and comfortable grip while enhancing the overall look of the railing.
Cable Railing Kit: Fittings such as turnbuckles, end sleeves, and tensioning hardware.
Stainless Steel Cables: High-quality, corrosion-resistant cables.
Extension Connectors: For attaching handrails.
Stainless Steel Sleeves: Cover holes or prevent wire rope wear.
Cable Cutter: A specialized tool for trimming cables cleanly.
User Guide: Step-by-step instructions and diagrams.

🔧Organize these components into groups (e.g., posts, cables, hardware) to avoid confusion during installation.
Pro tip: Snap a photo of the sorted parts for quick reference later!
Before starting, gather essential tools like a drill, Allen wrench, socket wrench, markers, tape measure, laser level, crimping tools, and a tension tester, along with safety gloves to protect your hands. Double-check that tools are functional and your workspace is clutter-free—this minimizes risks and ensures a smooth, injury-free installation.
3. Review the User Guide
Take 10 minutes to skim through the included manual. Familiarize yourself with the terminology, tools required, and safety tips. Muzata guide often includes pro tricks for tackling common challenges, like aligning posts or tensioning cables evenly.
Once you've confirmed everything is accounted for and undamaged, you're ready to move on to the next phase: measuring, planning, and assembling your stunning new deck railing systems. Stay tuned for the next section, where we'll break down post installation and cable threading like a pro!
Why This Matters: Skipping these preparatory steps can lead to mid-installation surprises, like missing hardware or uneven tension. A little patience now ensures a flawless, frustration-free build later. If you encounter any issues not covered in the user guide or on our website, don't hesitate to contact our customer support team immediately—we're here to ensure your installation succeeds smoothly and stress-free! Let's get it right the first time!
Muzata Cable Railing System Installation Guide
✨Plan Your Project
Check Local Codes: Confirm height, spacing, and load requirements.
Measure Your Deck: Determine post spacing.
Choose Materials: Muzata offers surface-mount, side-mount and slope-mount systems for versatile designs.
📋 Need help planning? Read: How to Plan a Cable Railing Project
🛠️Installation
▶️ Watch: Muzata Installation Videos
Step 1: Place and Install the Posts
Muzata deck cable railing systems offer three installation methods: surface mount, side mount, and slope mount.
● Surface Mount: Stable and easy to install

--Photo credit: Muzata customer
● Side Mount: Increase your space utilization

--Photo credit: Muzata customer
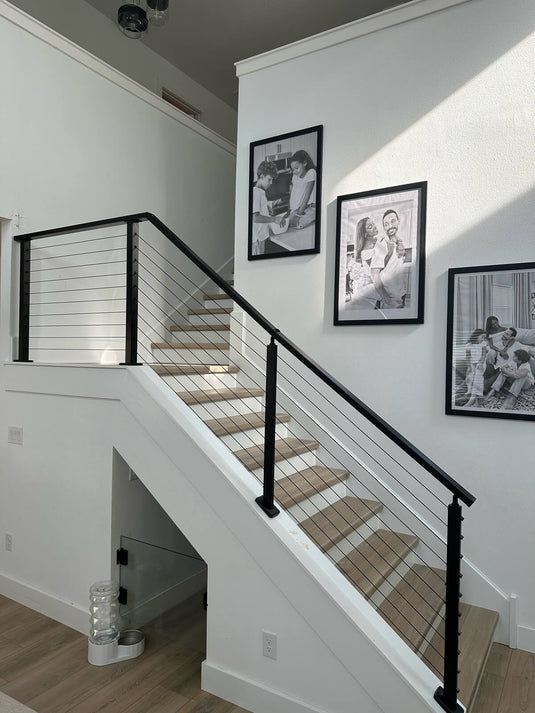
● Slope Mount: Reserve more stepping space to improve walking comfort

--Photo credit: Muzata customer
Step 2: Add Handrails (Optional)
Muzata All-In-One System includes the Complete Cable Railing Kit and the No-Handrail Cable Railing Kit.
Mount the fixed top bracket to the post's top using bolts, then position the handrail, measure its length (cutting if needed for non-standard 6'6” post spacing), and mark mounting holes. Secure handrail connections with accessories, ensuring a post supports the joint beneath. Drill holes at connection points using a punch, align and bolt them, and finish by attaching the end cap for a polished result.
|
For corner connection |
For straight connection |
|
|
Step1 |
 |
 |
|
Step2 |
 |
 |
|
Step3 |
 |
 |
Step 3: Attach Cables
Thread the cable through all posts, installing adhesive washers on structural posts and protective sleeves on middle posts. Secure one end to a structural post with an Allen wrench, then pull the cable taut, mark and cut it. Attach the tensioner(s), tighten sequentially with a socket/Allen wrench, and alternate tightening upper/lower cables from the center outward for stability. Verify tension with a test tool if needed, then finalize adhesive washers and sleeves on all posts.
|
Steps |
①
 |
②
 |
③
 |
④
 |

💡 Pro Tip: For a polished look, install horizontal cables parallel to the deck surface.
Step 4: Final Inspection
After completing your cable railing installation, perform a thorough final inspection to ensure safety and durability. Check that all posts are securely anchored and stable, cables are evenly tensioned and aligned without sagging, and all connectors (turnbuckles, sleeves, etc.) are tightly fastened. Verify that the railing height and cable spacing comply with local building codes (typically 36–42" tall, ≤4" gaps). Inspect surfaces for scratches, dents, or debris, and clean as needed. Test tension consistency across cables using a tension gauge, and gently shake the railing to confirm structural integrity. Address any issues immediately—this critical step guarantees your system remains safe, functional, and visually flawless for years to come. Verify compliance with local building codes.🔍

🔥 Get Inspired from Muzata Customer Project: From Graham's Deck to Yours: DIY Cable Railing Made Easy
Conclusion

Installing a deck railing doesn't have to be daunting. With Muzata all-in-one cable railing system, clear instructions, and pro tips, you can achieve a sturdy, stylish result that meets safety codes and elevates your outdoor space. Whether you're tackling a flat deck, sloped stairs, or side-mounted designs, Muzata kits simplify the process with precision-engineered components. Ready to transform your deck? Explore our installation videos and customer success stories, then start your project today. Safety, aesthetics, and value—all in one DIY solution! 🛠️✨